Showing posts with label DIY. Show all posts

Sunday, August 30, 2015

Letter Painting Party

For whatever the reason, I got a little motivated to do some painting over the weekend. I literally have unfinished projects and tasks at every turn, but painting three "H"s took priority...who knows! Despite the fact that I questioned why on earth I was spending time doing this instead of "fill in the blank" that probably should have been done first...I really enjoyed getting creative and love how these turned out!


With football season right around the corner, it's time for the LSU decor to start making it's appearance! This "hey y'all" purple and gold H hangs on our coat closet door which is right next to our front door. It's ready to greet some guests! Geaux Tigers!


Now, I love a themed wall. We actually have several...a key themed wall sits in our front room, a cross themed wall decorates the mini hall way in front of our bedroom...but my favorite is the H themed wall behind our bed. Thanks to my little dip into creativity this weekend, two more Hs now grace that wall!


Yes...that is a Harry Potter themed H. Don't be jealous. ;)


We still have lots of room to add some more fun Hs...maybe this DIY streak will be back next  weekend for some more fun! Or...maybe I'll do some of those other projects and tasks that need to be done...like laundry. 

Tuesday, February 17, 2015

Painting Furniture with Spray Paint

I like brown. Basically everything in our home is brown. Our floors are a beautiful brown. Our couches are a lovely brown. A good chunk of our furniture is the exact same brown. Yep, I like brown. But let's face it...the Henrys aren't really a monochromatic family. We all have pretty colorful personalities and our home should reflect that.

Plus, I've been itching for a good DIY project.

The decision was made to add a pop of color in our living room by painting one of the pieces of furniture. The target became a large end table that we scored off of Craigslist a few years ago. It was a rather dull but solid wood piece that was just begging for a make over. I recently read an article about a painting technique using Vaseline. It claimed to ease the job of scuffing so I was immediately intrigued. I'm a big fan of short cuts. Hence my desire to also use spray paint for this project. I know what you are thinking...and yes, I agree. Spray paint is awfully tacky, lazy, and toxic. But here is the deal...if it turned out ugly, I can always start over and do it properly. Currently, I'm all about maximizing my personal time and spray paint promised to assist with that goal. So...the fun began.


I wanted a muted green but struggled to find the right paint. Then I spotted it...a matte Camouflage. Not really the appropriate paint for furniture...but the color was pretty perfect. This just raised my doubts that this project wouldn't turn out properly and, at this point, I was confident that I would definitely need to be redo everything. But the lazy, crazy train had already left the station...what was there to lose...so...purchased!

Step one...scuff. I truly hate prepping furniture...but...it is a necessary evil. After removing the doors and all the hardware, I went to town. Thankfully, there wasn't a ton I needed to scuff off...so it was a quick process!


Once I felt it was properly scuffed, I moved on to step two...Vaseline. In retrospect, I put too much. So learn from my mistake and put just a touch on your finger and rub on only the edges you want scuffed the most. In addition to the edges, I also placed little globs in random places throughout...I probably wouldn't do that again. You're welcome.


Next, I flipped the piece upside down and continued with step three...spray paint. I did two coats to ensure proper coverage each way (upside down and right side up). When painting with spray paint, remember it's all about keeping a proper distance and spraying in motion. If you are too close or too still, you'll chance dripping and no one wants that.


Once it dried thoroughly, over several days, I busted out the sandpaper again and embraced step four...scuffing again. The Vaseline really did ease the pain of scuffing the edges. It helped make those spots more dramatic and I'm ultimately glad I did it. Even though I put too much, it worked for this project because I wanted a nice bit of the original brown to shine through.


Once I felt it was scuffed enough and perfectly imperfect, I replaced the hardware and doors.


If I'm being honest, I must admit that I actually put the doors on wrong...twice. Chris had to come to my rescue because I was really close to tossing the whole piece over the fence. Thanks Chen...doesn't he look thrilled!


When the doors were on properly, I wiped the piece down with a damp cloth and followed up with a vacuum just to make sure all the dust was gone before bringing inside.


All in all, I'm pretty pleased with the finished product. It's a muted, matte green but still brings a nice pop of color into the room. It was ridiculously easy and a nice little project that got my creative juices flowing...now, on to the next one! ;)


Sunday, January 11, 2015

DIY Dog Ear Infection Cleaner

Our poor Oliver has had some nasty bouts with ear infections....we are talking ridiculously disgusting! That is the downside to those adorable cocker spaniel ears...too much moisture and not enough ventilation. After crazy vet visits with the same antibiotics and poignant smelling ear wash, I thought taking things into may own hands couldn't make it any worse. So I did a little research and came across an ear wash recipe from Zim Family Cockers, a site for cocker spaniel fanatics. I got all the ingredients and waited for the signs of the next nasty ear gunk....and what do you know...the red coloring and funky smells showed up...


Poor Oliver! Thankfully the coloring on this picture is much worse than it looked in reality...but it was still pretty bad. So I went to work...


Ingredients:

2 ounces White Vinegar
1 1/2 teaspoons Powdered Boric Acid
6 ounces Isopropyl Alcohol
1 teaspoon Betadine Antiseptic Solution
A few drops Lavender Essential Oil
Empty Bottle

First, I cleaned out an old bottle of our ear wash from the vet and poored the ingredients through a typical funnel. One of the warnings on the original recipe was to add the ingredients in this specific order to ensure everything dissolves properly. So...begin with your alcohol and then dump in your boric acid.

Give the bottle a little shake to make sure the acid dissolves. Next add your vinegar...shake a little more...add your Betadine...shake a little more...and then top off with your essential oil. I added the lavender to have a touch of soothing and calming smell...for me and Oliver!

Now...for the hard part. Oliver HATES getting his ears cleaned! The goal is to squirt the solution inside the ear canal. Let the solution sit in the ear canal, fold down the ear over the canal, and gently massage the ear to make sure the solution really sloshes around nicely. Another option is to soak a cottonball and place it near the ear canal, flop that floppy ear back over, and massage the ear to make sure the cottonball releases as much solution into the ear as possible. This is the method Oliver typically allows because he hates the solution just being squirted in his ear!

Even after the first cleaning we saw a huge difference. We did this daily for a week and are now doing weekly cleanings with his bath.


His ears are still a little sad and I'm thinking our next step is to get rid of some of the hair around his ear canal to help keep them dryer longer. While I would like to leave this task to a professional... Chris saw a video online of an at-home ear hair plucking with a special powder...so we'll see...

A note to keep in mind about this solution: the betadine is an orange tint and can easily stain clothes, furniture, etc....so be careful!

Monday, January 5, 2015

Snowman Munch Gifts


Before "school" let out for Christmas, Chris made these adorable little gifts for Lily and Harrison's teachers. Yes, you read that right...CHRIS made these adorable little gifts. I barely had anything to do with it! 

First, he made the goodness that filled these mason jars! He melted white Almond Bark over a mixture of pretzels, Cheerios, Chex Mix, Graham Cracker Crunch, and M&Ms. You can also add a variety of nuts but since these were being brought into the day care, we stayed clear for nut allergies.


Once the goodness hardened, he broke it up and placed it in the mason jars. Next, he hot glued little black buttons onto the mason jars. *Note: these eventually fell off so we suggest more heavy duty glue!


Lastly, and this is where I finally came in to help, I tied a little red ribbon around the neck of the jar to look like a little scarf!


These little gifts were a huge hit and so super easy! 


Thursday, December 18, 2014

At-Home Hair Cut

When one is growing their hair out, they typically get to a point of "I'm going to shave my head". Well, I didn't get quite there the other evening...but I got close. I had this "awesome" ducktail/mullet in the back that was driving me batsh*t bananas. Chris jokingly asked if I wanted him to cut it...and to everyone's shock, I said yes. I just couldn't handle it anymore. So out came the scissors...


It was like a crazy trust exercise...thank goodness it worked out!

Thanks Chris!

Sunday, December 14, 2014

DIY Dog Shampoo

With a toddler and a 9 month old, our poor furbabies get the very last of our attention. Well, when Oliver, our cocker spaniel,  jumped in my lap this afternoon and I really took a second to love on him...my heart just broke. His poor ears are a mess and I noticed a couple little spots on his skin that have been itching him...funky allergies. So, I decided it was time for a puppy spa day!

Oliver got a good smellin' bath, an ear cleaning, a manicure and pedicure, with a mini massage. He is once again a happy and good smelling boy!

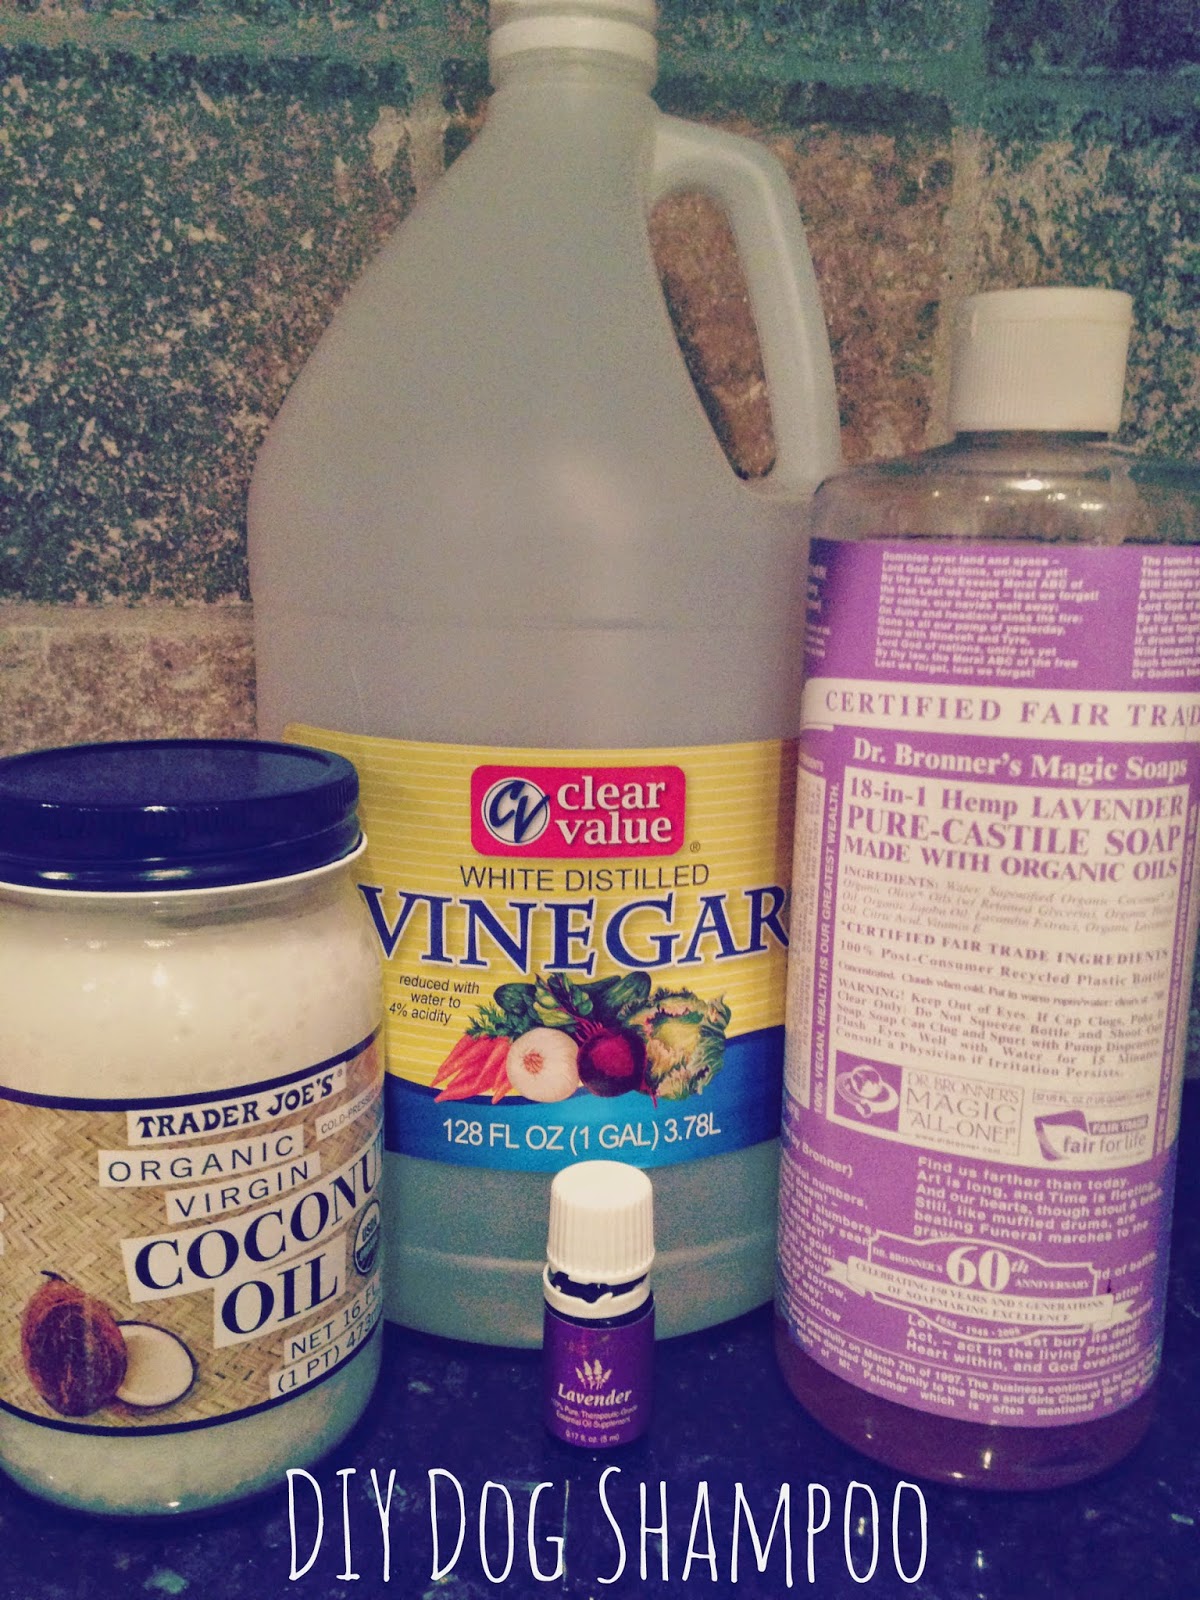
I'm not a big fan of how dog shampoos smell so I decided it was time for a DIY option. He needed something that would deodorize but also moisturize his skin. So I did a bit of research and this is what I came up with...enjoy!


1/2 cup of distilled white vinegar
1 tablespoon of coconut oil
5 tablespoons of castile soap
10 drops of essential oil
2 cups of warm water

I put all the ingredients into an old shampoo bottle and mixed well.

Since my Dr. Bronner's Castile Soap was lavender scented, I also used my Young Living Lavender Essential Oil. Not only does it smell fantastic, but it's also a calming and soothing on his skin. I'm a big fan of how smooth and shiny his coat is and he hasn't been scratching since the bath...which is huge for our sweet Oliver!

My only complaint is that it didn't lather very well. I'm going to keep an eye on his ears and little hot spots, but so far so good! He smells delicious, looks fantastic, and seems to be a happy boy! We will definitely be trying again next bath time!

Next on our list is a DIY ear cleaner...stay tuned!

Tuesday, December 9, 2014

Fun & Easy Christmas Card Display

Our Christmas decor is getting a bit of a facelift this year...with a bunch of DIY projects that I can't wait to share! Starting with this fun and easy way to display Christmas Cards.


Your family and friends work too hard on their Christmas Cards each year to just be tossed aside! Show off their beautiful work with a fun garland on a doorway or, in our case, a china buffet! I spray painted a bunch of clothes pins and as the cards come in, we clip them on!


For the sign, I just grabbed a blank piece of wood from my local craft store and painted away! I mean..."Merry Mail"...adorable, right!?! Thanks Pinterest! ;)

Can't wait to see what this looks like full! Stay tuned for an update a little closer to Christmas!


Tuesday, December 2, 2014

DIY All Purpose Spray


After several stomach bugs and a nasty ear infection hit the Henry House...in the same month...I lost my mind calmly reevaluated our operations and decided to toss the chemical cleaners. Clearly something was running a muck in our home and I was desperate to kick that sh*t to the curb! I started with an All-Purpose Spray...and one month later I'm still loving it! I feel healthier and it smells AMAZING...oh yummy lavender! Check out this easy peasy recipe!

DIY All-Purpose Spray

Empty and Clean Spray Bottle
3 tablespoons of vinegar
1 teaspoon castile soap 
1/2 teaspoon baking soda
15-20 drops of lavender essential oil
2 cups of hot water

Mix well and get to cleaning! 

There will be a fuzzy reaction when you mix the baking soda and vinegar so just be warned. I used Dr. Bronner's  Lavender Castile Soap...because it's amazing. I also used Young Living Essential Oils...because they too are amazing. 

I've used this spray on a myriad of surfaces with no regrets! Enjoy!